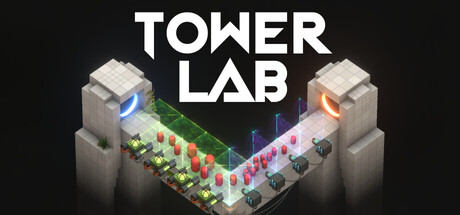
- Tower Lab tower defense replaces health bars with physics-based knockback and map control.
- Build variety comes from combining towers, cores, physics cards, utility cards, and traps.
- Best opening plan prioritizes reliable displacement before experimenting with high-risk interactions.
- Roguelite progression improves each run through purchases, rerolls, removals, upgrades, and meta progression.
- Early Access status means balance, late-game content, and workshop tools may continue changing.
Tower Lab Tower Defense Overview
Tower Lab tower defense is a physics-driven strategy game built around one unusual rule: enemies do not rely on traditional health bars. Instead, towers push, pull, bounce, grow, shrink, and fling robotic enemies from the map. Victory depends on controlling momentum, positioning devices intelligently, and creating reliable interactions between multiple towers.
The Steam page lists Tower Lab as a single-player, roguelite tower defense and deckbuilding game with sandbox, strategy, simulation, and building elements. Its planned Early Access release date is September 7, 2026. As of September 6, 2026, the game is listed as not yet available, so features and balance may change during development.
Treat every tower as part of a machine rather than an isolated weapon. A modest push can become powerful when another tower changes an enemy’s size, direction, or landing position.
Physics Control
Manipulate enemy movement through pushing, pulling, bouncing, growing, shrinking, and launching.
Open Placement
Place towers in open spaces and move them freely while testing layouts and interactions.
Deckbuilding
Draft cores, physics cards, utility cards, and traps to shape each run’s strategy.
Sandbox Testing
Experiment with combinations and create levels for sharing through Steam Workshop tools.
The game’s design makes spatial planning more important than simply increasing damage. A tower with limited direct impact can still be valuable if it redirects enemies into another mechanism. Before committing to an upgrade, ask whether it improves your main displacement route, protects a weak approach, or creates a new interaction.
| System | Primary role | Practical focus |
|---|---|---|
| Towers | Create physical interactions | Build chains instead of isolated placements |
| Player cores | Modify a run | Select effects that support your main control plan |
| Physics cards | Alter physical behavior | Use them to improve movement and consistency |
| Utility cards | Add flexible support | Cover weaknesses in your tower arrangement |
| Traps | Provide additional control | Place them where enemy movement is predictable |
How Physics Combat Works
Tower Lab removes conventional damage numbers from its central combat loop. The objective is to push robots off the map, which means the arena itself becomes part of your weapon system. Edges, gaps, approach lanes, tower positions, and enemy momentum all matter when planning a defense.
The most reliable strategy is to create a clear path from enemy entry to removal. Early in a run, avoid scattering towers across the entire map without a purpose. Concentrated interactions are easier to understand, upgrade, and repair when a wave behaves differently than expected.
A powerful tower can underperform if it fires from the wrong angle. Leave room for movement, observe the enemy route, and position each device around a specific displacement goal.
Build Around a Primary Displacement Route
A displacement route is the sequence of physical effects that moves an enemy toward the edge. It may begin with a push, continue through a bounce, and finish with a stronger launch. The exact combination depends on the towers, cards, cores, and traps available during the run.
Use these principles when testing a route:
- Start with consistency: A repeatable shove is more valuable than an impressive interaction that rarely connects.
- Control angles: Place towers so their effects move enemies toward the same removal area.
- Protect the setup: Keep critical devices away from crowded paths when possible.
- Watch enemy size: Shrinking can make robots easier to move, while growing may increase rewards but also raise the control challenge.
- Reserve open space: Free placement is a major strength, so do not fill every available area immediately.
| Physical effect | Strategic use | Main risk |
|---|---|---|
| Push | Starts or redirects enemy movement | Poor angles may send enemies away from danger |
| Pull | Repositions targets into a setup | Can group enemies in an unsafe location |
| Bounce | Extends a chain or changes direction | Requires careful timing and spacing |
| Shrink | Makes robots easier to push | May reduce the value of size-based rewards |
| Grow | Increases projectile power and potential rewards | Larger enemies may be harder to displace |
| Fling | Finishes a removal route | Misses can waste the strongest opportunity |
Size management creates an important risk-and-reward decision. The game describes shrinking robots as easier to push, while growing them can provide increased rewards. This means the safest choice is not always the most profitable one. Use growth effects when your layout already has enough control to handle heavier or larger targets.
Read the Arena Before Upgrading
Before spending resources, identify:
- The safest edge or removal zone.
- The direction enemies naturally approach from.
- The location where a bounce would help rather than disrupt.
- The tower that currently determines your route.
- Any empty space needed for future combinations.
A strong layout does not need to use every tower immediately. It needs enough connected effects to make enemy movement predictable.
Step-by-Step Run Setup
Each run combines tower placement, deck decisions, and upgrades. The following process gives new players a structured way to evaluate choices without relying on a fixed build. Since Tower Lab is designed around emergent physics interactions, flexible decision-making is more valuable than memorizing one universal setup.
Choose a Clear Run Direction
Begin by identifying whether your available tools favor pushing, pulling, bouncing, size control, traps, or projectile growth. Select cards and cores that reinforce the strongest early interaction instead of collecting unrelated effects.
Place the First Control Point
Build around the first location where enemies can be redirected. Keep enough open space for movement and place the initial tower so its effect sends targets toward a useful follow-up position.
Add a Compatible Follow-Up
Choose a second tower or trap that benefits from the first effect. Test whether enemies remain on the intended route; if they drift away, move the towers before adding more complexity.
Improve the Weakest Link
Use purchases, rerolls, removals, or upgrades to improve consistency. A small improvement to the tower that starts your chain may outperform a major upgrade to an effect that rarely connects.
Commit to the Reliable Pattern
Once a route works, protect it from unnecessary changes. Experiment in open space, but keep the core removal chain intact while preparing for stronger enemies and later encounters.
Improve the part of the chain that fails most often. Reliability at the first contact point usually makes every later interaction easier to evaluate.
Choosing Between Run Resources
The Steam description confirms that players can purchase, reroll, remove, and upgrade during a roguelite campaign. Each option serves a different purpose, so use them deliberately.
| Run option | Best use | Decision rule |
|---|---|---|
| Purchase | Add a new tool or effect | Choose it when it supports your current route |
| Reroll | Replace an unhelpful selection | Use it when available choices do not address your weakness |
| Remove | Reduce unwanted deck clutter | Remove effects that do not contribute to your plan |
| Upgrade | Improve an existing component | Prioritize the most frequently used interaction |
| Experiment | Test a new combination | Try it in open space before disrupting the main route |
A compact deck or focused collection of effects is easier to manage than a collection filled with disconnected ideas. However, do not remove every flexible option. Utility cards may become valuable when an enemy pattern exposes a weakness in your primary route.
Towers, Cores, and Build Variety
The Early Access description lists 20 playable towers, each with its own tech tree and interactions based on real physics. It also lists 40 total cores, including 26 run-modifying player cores and 14 Hazard Cores, along with 7 physics-effect cards, 8 utility cards, and 7 traps. These numbers describe the planned Early Access version and may be adjusted as development continues.
The best build is therefore defined by interaction quality rather than a simple tower ranking. A tower becomes more valuable when it supports several parts of your route or solves a common failure point.
Control Builds
Focus on pushing, pulling, bouncing, and positioning. Strong for players who prefer predictable enemy movement.
Risk-Reward Builds
Use growth effects and stronger projectiles to pursue increased rewards while accepting more difficult control requirements.
Trap Builds
Combine movement manipulation with traps placed at predictable locations. Effective when your route consistently funnels enemies.
Judge a combination by three questions: Does it move enemies toward the edge, does it remain reliable under pressure, and does it leave enough space for adaptation?
| Build focus | Useful components | Strength | Limitation |
|---|---|---|---|
| Direct control | Push and pull effects | Clear route correction | Can struggle if enemies spread out |
| Bounce chain | Bounce-focused towers and cards | Extends movement across the arena | Spacing and angles matter heavily |
| Size control | Shrink and grow effects | Adds flexibility and reward choices | Risk increases when targets become larger |
| Projectile power | Enlarged projectiles and upgrades | Can strengthen key interactions | May not solve poor enemy positioning |
| Hybrid utility | Towers, utility cards, and traps | Adapts to changing situations | Less focused than a dedicated route |
Machines and Run Identity
Tower Lab includes 5 playable machines, each with its own starting items and real-time abilities. Treat a machine’s opening tools as the foundation of the run rather than a restriction. First determine what the starting kit does well, then select later additions that compensate for its weaknesses.
For example, a machine with strong opening control may benefit from utility effects that improve flexibility. A machine with powerful projectiles may need better positioning tools to ensure those projectiles influence enemy movement. The specific balance can change during Early Access, so test the machine’s identity instead of assuming every starting item has equal value.
Progression, Modes, and Early Access Planning
Tower Lab’s Early Access version is described as playable from start to finish with multiple game modes and meta progression. The initial campaign is planned to include three regions in a roguelite deckbuilding structure. The game also lists leaderboards for multiple modes, Steam achievements, Steam Workshop support, and an included level editor.
Meta progression gives unsuccessful runs lasting value, but it should not replace improving your immediate layout. Use each attempt to learn which tower interactions are dependable, which choices create unnecessary risk, and where your route breaks down.
After a difficult run, identify one failure point rather than changing everything. A single adjustment to placement, card selection, or size management can reveal more than a completely different build.
| Feature | What it provides | Best player approach |
|---|---|---|
| Roguelite campaign | Changing runs and run-based decisions | Adapt to available tools |
| Meta progression | Longer-term improvement between runs | Invest in learning and experimentation |
| Three planned regions | Initial campaign structure | Expect regional encounters to test different layouts |
| Leaderboards | Performance comparison across modes | Refine consistency before chasing speed |
| Level editor | Custom level creation | Use it to test unusual physics setups |
| Steam Workshop | Sharing and discovering levels | Explore community layouts as they become available |
The Steam page also lists adjustable difficulty, save anytime, camera comfort options, custom volume controls, a mouse-only option, and play without quick-time events. These accessibility features can make extended experimentation more comfortable, especially when testing complex tower arrangements.
Hardware and Platform Notes
The listed system requirements include Windows 10 64-bit and macOS 12.0 or later. The minimum Windows configuration specifies 8 GB of RAM, a GTX 960 or Radeon R9 280-class graphics card, DirectX 11, and 2 GB of storage. The macOS listing specifies 8 GB of RAM and support for Apple M1, Intel Iris Plus Graphics 640, or AMD Radeon Pro 555-class graphics.
| Platform | Minimum operating system | Memory | Storage |
|---|---|---|---|
| Windows | Windows 10 64-bit | 8 GB RAM | 2 GB |
| macOS | macOS 12.0 Monterey or later | 8 GB RAM | 2 GB |
For the latest availability, feature details, and Early Access notices, check the official Tower Lab Steam page. Development plans can change, including the timing of content, balance, performance improvements, and Workshop tooling.
Tower Lab Strategy Checklist and FAQ
Use this checklist when starting a new run or reviewing a layout. It focuses on the game’s confirmed physics, deckbuilding, and progression systems rather than a fixed tier list.
Before Committing to a Build:
- Identify the safest edge or removal zone
- Create one reliable displacement route
- Keep open space for tower combinations
- Choose cores and cards that support the main interaction
- Test growth effects only when control remains stable
Tower Lab is planned for Early Access on September 7, 2026. Towers, cards, regions, balance, and Workshop features may change as development continues.
Practical Reference
| Question | Short answer |
|---|---|
| Is combat based on health damage? | No. The central system uses physical displacement instead of damage numbers. |
| Can towers be placed freely? | The game is designed for open placement in available spaces and supports moving towers during experimentation. |
| What creates build variety? | Towers, tech trees, cores, physics cards, utility cards, traps, and machine-specific starting items. |
| Is there a sandbox component? | Yes. The game includes sandbox experimentation, a level editor, and planned Workshop sharing. |
Q: What makes Tower Lab tower defense different from traditional tower defense games?
Enemies do not rely on health bars in the central combat loop. Towers manipulate physical movement, and the main objective is to push robots off the map.
Q: Should I prioritize more towers or better combinations?
Better combinations are usually the safer priority. A focused chain that reliably moves enemies toward an edge is easier to improve than several disconnected towers.
Q: How should I use growth and shrink effects?
Shrinking can make robots easier to push, while growing robots may provide increased rewards and make projectiles more powerful. Use growth when your layout can manage the added control risk.
Q: What content is planned for the Early Access version?
The listed Early Access plan includes 20 towers, 40 cores, physics and utility cards, traps, 5 machines, meta progression, multiple modes, leaderboards, and an initial campaign with 3 regions.
The strongest general lesson is to build around movement. Start with one dependable route, add effects that reinforce it, and use the sandbox freedom to test interactions before replacing a working setup. As new towers, regions, rewards, and Workshop tools arrive, this approach should remain useful even when individual balance values change.