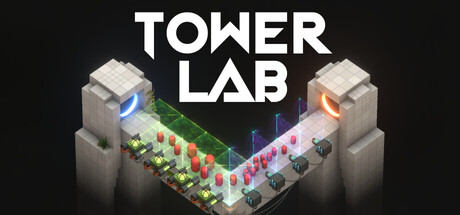
- Tower Lab physics based tower defense replaces health bars with momentum, force, and map hazards.
- Flexible placement lets you move towers freely and test unusual defensive contraptions.
- Tower combinations create emergent effects through real physics rather than fixed combo scripts.
- Roguelite runs use towers, cores, physics cards, utility cards, traps, and machine abilities.
- Early Access timing is planned for September 7, 2026, with content expanding through development.
How Tower Lab’s Physics Defense Works
Tower Lab physics based tower defense is built around a simple but unusual objective: push robots off the map instead of reducing their health. The game has no traditional damage numbers. Towers can push, pull, bounce, grow, shrink, or fling enemies, turning every level into a tactical physics puzzle.
This changes how you evaluate a defensive setup. A tower is not useful only because it attacks quickly or deals high damage. Its value depends on force, position, timing, mass, projectile behavior, and how well it interacts with nearby structures.
The official Tower Lab Steam page describes the game as an experimental strategy title with roguelite deckbuilding, sandbox construction, and physics-driven tower combinations.
| Core mechanic | What it changes | Practical focus |
|---|---|---|
| No enemy health | Robots are removed through displacement | Control lanes and launch points |
| Physics interactions | Towers influence one another through force and motion | Test combinations instead of isolated towers |
| Free placement | Defensive structures can be positioned in open spaces | Build around terrain and drop zones |
| Mass control | Robot and projectile size affects handling | Balance reward potential with control |
| Roguelite progression | Each run develops through limited choices | Prioritize flexible upgrades early |
Push
Use direct force to move robots toward edges, gaps, or dangerous terrain. Push effects are easiest to understand and often form the foundation of an early defense.
Pull
Reposition enemies into a controlled area or bring them closer to a secondary tower. Pull effects become stronger when several structures share one target zone.
Bounce
Redirect robots or projectiles through repeated impacts. Bouncing setups reward careful spacing and can convert a narrow lane into a chain-reaction arena.
Scale
Grow or shrink robots and projectiles to alter risk, power, and reward. Smaller robots may be easier to move, while larger targets can create more difficult control problems.
Evaluate every tower by asking where it sends a robot, not merely how often it activates. The best placement creates a reliable path to removal.
First Setup and Placement Strategy
Your first setup should create a predictable control zone before you chase complicated interactions. Place an initial tower where it can influence the largest number of incoming routes, then leave enough room for supporting structures and moving projectiles.
Because towers can be placed in open spaces and moved freely, experimentation is part of the intended strategy. Do not lock yourself into a symmetrical layout if an offset position gives a projectile a better angle or places a robot closer to the map edge.
Use the following process when entering a new level:
Identify the Removal Edge
Find the nearest map boundary, drop point, or dangerous area that can remove robots. Treat this location as your main target and build backward from it.
Choose a Control Zone
Select a space where one tower can affect incoming robots without blocking future placements. A central position is useful, but a side angle may produce better force direction.
Add One Supporting Effect
Pair the first tower with a push, pull, bounce, growth, or shrink interaction. Add only one major variable at first so you can see how the system behaves.
Test Timing and Spacing
Watch whether robots leave the map consistently or stall near the edge. Move structures, adjust spacing, and improve the route before spending heavily on upgrades.
| Setup phase | Main question | Good result |
|---|---|---|
| Reconnaissance | Where can robots be removed? | A clear edge, gap, or hazard |
| Foundation | Which tower controls the route? | Consistent displacement |
| Support | What effect improves the route? | Better positioning or momentum |
| Testing | Where does the setup fail? | A visible adjustment target |
| Upgrade | Which improvement increases reliability? | More control with fewer wasted actions |
A strong opening usually favors consistency over spectacle. A dramatic chain reaction may remove several robots in one test but fail when their entry timing changes. Build a repeatable system first, then add higher-risk interactions once the route is stable.
Placing too many towers before understanding their interactions can create clutter, poor projectile angles, and unpredictable momentum. Add structures one meaningful effect at a time.
Towers, Cores, Cards, and Machines
The Early Access version is planned to include 20 playable towers, each with its own tech tree and physics interactions. Runs also include 26 player cores, 14 Hazard Cores, 7 physics-effect cards, 8 utility cards, and 7 traps, for a broad set of possible configurations.
These systems serve different purposes. Towers form the physical engine of a defense. Cores modify the direction of a run. Physics cards influence interactions, utility cards support the broader setup, and traps provide additional control points. Machines define a run style with unique starting items and real-time abilities.
| System | Planned Early Access amount | Role in a run |
|---|---|---|
| Playable towers | 20 | Main structures with individual tech trees |
| Player cores | 26 | Run-modifying choices |
| Hazard Cores | 14 | Higher-risk run modifiers |
| Physics-effect cards | 7 | Change or enhance physical interactions |
| Utility cards | 8 | Provide supporting tools and effects |
| Traps | 7 | Add map-based control options |
| Machines | 5 | Define starting items and real-time abilities |
Tower-Focused Builds
Prioritize compatible tech trees and effects that improve displacement. These builds are easier to read because the main plan comes from direct tower interactions.
Hazard Builds
Use Hazard Cores and dangerous interactions to increase challenge or reward potential. Keep a dependable removal route available before adding risk.
Machine Builds
Choose a machine that matches your preferred run style, then use its starting items and real-time ability as the foundation for later decisions.
A useful drafting rule is to select options that solve different problems. For example, one effect can move robots, another can correct positioning, and a third can protect the route from mass or timing changes. A deck filled with similar effects may look powerful but can become fragile when the level demands a different angle.
The planned campaign includes meta-progression and a collection screen. That means individual runs are only part of the broader loop. Record which towers and cards create reliable results, then use future runs to test variations instead of repeating an unexamined build.
The strongest long-term approach is a flexible collection of effects: one reliable displacement tool, one positioning tool, and one option for recovery when the physics chain breaks.
Mass, Rewards, and Risk Management
Mass control is one of Tower Lab’s defining tactical choices. Shrinking a robot can make it easier to push, while growing it can increase the potential reward. Projectiles can also be grown to make their impact more powerful. These choices create a direct trade-off between control and payoff.
Use mass changes deliberately rather than automatically. A smaller robot may travel more predictably through a push chain, while a larger robot may resist the same force and disrupt the intended route. Similarly, a larger projectile may deliver more force but require more space and better timing.
| Decision | Potential benefit | Main risk |
|---|---|---|
| Shrink a robot | Easier displacement and finer control | Lower reward potential |
| Grow a robot | Increased reward potential | More difficult movement |
| Grow a projectile | Greater impact or momentum | Wider timing and placement demands |
| Add a trap | Extra control point | More complex interaction space |
| Take a reroll | Better chance at a needed effect | Consumes a limited run resource |
Follow this risk ladder when testing a new interaction:
- Establish a removal route with normal mass.
- Shrink a difficult target and compare its movement.
- Grow a projectile only after the route remains stable.
- Attempt larger robot rewards when you can recover from a failed chain.
- Keep a utility option available for unexpected positioning problems.
The game supports purchasing, rerolling, removing, and upgrading during a roguelite campaign. These choices should serve your current route rather than an abstract ideal build. Removing a redundant option can be more valuable than adding another tower that performs the same function.
Use growth effects after you understand the level’s geometry. Reward-focused choices are easier to manage when the removal edge and recovery space are already established.
Early Access Goals and Sandbox Progression
Tower Lab is planned to enter Early Access on September 7, 2026. The developers describe an expected Early Access period of roughly 6 to 12 months, while noting that development plans can change as balance, performance, and community feedback shape priorities.
The initial campaign is planned to include three regions, a roguelite deckbuilding structure, and meta-progression. Multiple game modes and leaderboards are also part of the planned Early Access feature set. Sandbox tools and player-created levels are intended to expand through Workshop development.
Use this checklist to organize early progression:
Early Progression Checklist:
- Learn one dependable push or pull route
- Test tower spacing before committing to upgrades
- Compare shrink and growth effects on different targets
- Build a flexible deck with control and utility options
- Experiment with sandbox tools after learning campaign basics
| Progression target | Why it matters | Suggested approach |
|---|---|---|
| Reliable removal route | Prevents early stalls | Build toward an edge or drop zone |
| Tower tech tree knowledge | Reveals interaction potential | Test one tower across multiple placements |
| Core familiarity | Improves drafting decisions | Compare safe and hazardous modifiers |
| Machine understanding | Clarifies run identity | Use the starting ability as a build anchor |
| Sandbox practice | Accelerates experimentation | Recreate successful campaign setups |
The planned full version is expected to add more towers, traps, units, machines, cores, physics cards, utility cards, rewards, levels, enemies, regions, and sandbox tools. It is best to treat Early Access as an evolving strategy environment rather than a fixed balance state.
For current availability and development details, check the official Tower Lab Steam listing. The listing identifies Windows and macOS requirements, single-player support, Steam Workshop features, achievements, leaderboards, and Steam Deck compatibility marked as playable.
Features, balance, and late-game content may change during development. Recheck official announcements before treating a current interaction or roster detail as permanent.
Tower Lab FAQ
Q: What makes Tower Lab different from traditional tower defense?
Tower Lab removes the usual health-bar focus. Robots are pushed, pulled, bounced, grown, shrunk, or flung off the map, so positioning and force matter more than damage per second.
Q: Does Tower Lab physics based tower defense use fixed tower combos?
The game emphasizes emergent interactions based on real physics. Towers can combine through placement, force, projectile behavior, and timing rather than relying only on scripted combination recipes.
Q: How many towers are planned for Early Access?
The Early Access description lists 20 playable towers, with each tower having its own tech tree and interactions with other towers through physics.
Q: When is Tower Lab planned to release?
The planned Early Access release date is September 7, 2026. The developers expect Early Access to last roughly 6 to 12 months, although the schedule may change during development.
Start with a repeatable displacement route, then expand your deck and experiment with mass, traps, cores, and machine abilities.