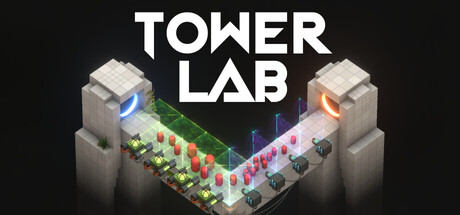
- Tower Lab upgrade order should strengthen one reliable physics interaction before adding extra effects.
- Primary upgrades usually belong on the tower that creates your main displacement or control zone.
- Supporting towers come next when they improve grouping, bouncing, projectile behavior, or positioning.
- Shop resources are more valuable when spent on synergy instead of unrelated tower effects.
- Map geometry should decide whether you prioritize push, pull, bounce, size, or projectile control.
Tower Lab upgrade order: Core Priorities
The best Tower Lab upgrade order is based on function rather than a fixed damage ranking. Tower Lab’s physics-driven defense rewards positioning, momentum, collisions, and enemy displacement. A modest tower placed near an edge can be more valuable than a stronger option in an open area, so upgrades should first make your main control pattern more consistent.
Start by identifying the interaction that currently prevents the most leaks. This may be a push effect that sends enemies toward a ledge, a pull effect that gathers targets into a kill zone, or a projectile setup that becomes stronger when enemies are grouped. Once that interaction works reliably, invest in the effect that extends or improves it.
| Upgrade Priority | What to Improve | Why It Matters |
|---|---|---|
| 1 | Main control tower | Makes the core push, pull, bounce, or projectile effect more dependable |
| 2 | Combo enabler | Helps gather, redirect, resize, or accelerate enemies for the primary tower |
| 3 | Coverage gap | Protects a route section where enemies regularly recover or escape |
| 4 | Utility option | Adds flexibility for unusual layouts or difficult enemy patterns |
| 5 | Experimental effect | Worth taking after the main defense already has a stable plan |
Push First
Best when: enemies can be sent toward exposed edges, corners, or dangerous terrain.
Pull First
Best when: several enemies need to be grouped before another effect can control them.
Bounce First
Best when: the map provides useful angles, walls, platforms, or collision paths.
Projectile First
Best when: your projectiles gain value from controlled enemy movement and overlapping coverage.
Upgrade the tower that creates the most important result, not necessarily the tower with the most visible activity. If one effect repeatedly places enemies where the rest of your defense can finish them, it is probably the correct first investment.
Early-Run Upgrade Path
During the opening part of a run, consistency matters more than variety. Adding too many unrelated towers can make future choices less useful and leave your defense without a clear physical identity. Build a small foundation that can handle ordinary waves, then expand only when the map or enemy behavior exposes a weakness.
The early plan below works across many physics-focused layouts because it prioritizes reliable control, useful positioning, and a defined follow-up effect.
Read the Route Before Upgrading
Identify entrances, narrow sections, corners, exposed edges, and areas where enemies have limited recovery space. The strongest early upgrade is often determined by the geometry around your first useful tower position.
Choose One Primary Interaction
Select a clear role for the first part of the build. Push can reset progress or remove enemies near edges, pull can create a group, and bounce can redirect targets through a planned collision path.
Add One Supporting Effect
Choose a tower that improves the primary interaction. Pair grouping with displacement, displacement with bouncing, or controlled enemy movement with projectile coverage. Avoid taking a second effect that does not contribute to the current plan.
Upgrade the Reliable Pair
Strengthen the two effects that are already producing consistent results. This usually gives better stability than spreading upgrades across every available tower.
Repair the Weakest Section
After the core pair is stable, address the location where enemies escape. Add coverage, reposition an effect, or choose a flexible utility option that solves the specific problem.
| Run Stage | Recommended Focus | Avoid |
|---|---|---|
| Opening | One primary control effect | Buying several unrelated towers |
| Foundation | A two-effect synergy | Upgrading every tower equally |
| Stabilization | Coverage near the leak point | Ignoring map geometry |
| Expansion | Utility or a second combo | Replacing a working build without testing |
| Late run | Scaling and reliability | Spending resources on novelty alone |
Do not upgrade a tower only because it appears powerful in isolation. If its force points away from useful terrain or scatters enemies out of your control zone, the upgrade may make the defense harder to manage.
Mid-Run Synergy and Upgrade Decisions
The middle of a run is where the upgrade order should respond to actual failure patterns. Watch which enemies survive, where they regain progress, and whether your physical chain breaks because of distance, direction, mass, speed, or poor timing. Then upgrade the part of the chain that addresses that failure.
A strong combination usually follows a sequence: one effect prepares the target, another changes its position or physical state, and the map converts that movement into a defensive result. Pull plus push can group enemies before sending them backward. Pull plus bounce can create a predictable cluster for a launch effect. Size manipulation can alter collision behavior before the main displacement occurs.
| Problem | Upgrade Response | Useful Pairing |
|---|---|---|
| Enemies remain spread out | Improve grouping or pull coverage | Pull + Push |
| Enemies reach the objective too quickly | Strengthen directional displacement | Push + Edge Control |
| Projectiles miss moving targets | Improve positioning before projectile contact | Pull + Projectile |
| Heavy enemies resist movement | Add repeated or layered force | Push + Bounce |
| Collisions are inconsistent | Improve approach direction and spacing | Pull + Bounce |
| Targets recover after impact | Add a second control point | Push + Pull or Bounce |
Use shop choices to improve the current plan rather than building toward an imagined perfect setup. If the available option does not strengthen your primary interaction, preserve resources when possible or choose a flexible tool that covers a known weakness. Rerolls are most valuable when one missing effect would significantly improve the run and the remaining resource cost is manageable.
When a combination works, make it easier to repeat. Upgrade the tower that starts the chain, tighten the distance between effects, and keep the final displacement pointed toward terrain that limits enemy recovery.
When to Add a New Tower
Add a new tower when it does at least one of the following:
- Completes a proven two-effect combination.
- Covers a route section that your current setup cannot reach.
- Helps control heavier or faster enemies.
- Provides a useful fallback when the main interaction is disrupted.
- Improves the quality of future upgrade choices without diluting the build.
Avoid adding towers that duplicate a role without improving range, direction, timing, or reliability. Redundant effects can occupy upgrade opportunities that would be better spent on the build’s central control point.
Advanced Order for Physics Builds
Advanced upgrades should focus on reliability and interaction quality. Tower Lab does not require every tower to perform the same job. Instead, assign each part of the build a clear responsibility: grouping, displacement, momentum, projectile delivery, size manipulation, or area control.
The order below is useful when your basic defense is already functioning and you are deciding between deeper specialization and broader coverage.
| Advanced Choice | Upgrade First When | Upgrade Later When |
|---|---|---|
| Push strength | A ledge or hazard can convert movement into removal | Enemies have no useful edge nearby |
| Pull range or control | Waves arrive in groups and need to be concentrated | Targets are already entering a strong kill zone |
| Bounce interaction | Terrain supports repeated collisions | The map is too open for predictable rebounds |
| Enlarge effect | Size changes improve collisions or positioning | No follow-up tower benefits from larger targets |
| Shrink effect | Smaller targets fit a precise control route | The build lacks enough force to exploit the change |
| Projectile behavior | Enemies can be held in overlapping coverage | Targets move too unpredictably for consistent hits |
| Utility or risk-reward effect | The main combo is stable enough to support experimentation | The defense is still leaking regularly |
Upgrade Around Mass and Momentum
Heavier enemies may resist a single push, while faster objects can create stronger collision reactions. If a target is difficult to move, stack compatible forces or use a setup that changes its approach before the main impact. If a target moves quickly through the defense, prioritize effects that make its position predictable.
Upgrade Around Direction
Force direction often matters more than raw strength. A forward push may only delay an enemy, while a sideways impact near an exposed edge can remove it from the playable route. Rotate placements and test one change at a time so you can identify which angle improves the result.
Upgrade Around Recovery Space
Enemies are easier to control when they have fewer places to recover. Concentrate upgrades near corners, narrow platforms, and edges instead of distributing every tower evenly. A compact control zone also makes grouping and projectile interactions easier to repeat.
Before choosing an advanced upgrade, ask three questions: Where will the enemy move, what effect follows next, and what terrain turns that movement into progress for your defense?
Upgrade Checklist and FAQ
Use this checklist when a run begins to feel unfocused. It is designed to keep the build centered on a reliable interaction while leaving room for adaptation.
Upgrade Order Checklist:
- Identify the map edge, corner, or control zone that matters most
- Choose one primary push, pull, bounce, or projectile interaction
- Upgrade the tower that starts the most reliable physical chain
- Add one supporting effect that improves grouping or displacement
- Spend remaining resources on coverage, utility, or a known weakness
| Decision Point | Recommended Question | Preferred Action |
|---|---|---|
| First upgrade | What stops the most enemies right now? | Strengthen that effect |
| New tower offer | Does it improve the current combo? | Take it if the role is clear |
| Weak shop options | Would any choice solve a real problem? | Save resources or reroll carefully |
| Repeated leaks | Where does control break down? | Move or upgrade that section |
| Late-run choice | Does this increase stability? | Prefer reliability over novelty |
Practical Rules for Better Runs
- Keep the first build narrow enough that upgrades remain meaningful.
- Test placement before assuming a tower needs more power.
- Use pull effects to create predictable groups instead of scattering targets.
- Use push and bounce effects where terrain limits recovery.
- Treat size-changing effects as combo tools, not automatic upgrades.
- Remove or avoid redundant options when they do not improve the main plan.
- Rebuild one part of a failing chain before replacing the entire defense.
Q: What is the best first upgrade in Tower Lab?
Upgrade the tower responsible for your most reliable control result. Push, pull, bounce, or projectile effects can all be correct depending on the route geometry and your current setup.
Q: Should I upgrade one tower or spread upgrades across the build?
Concentrate early upgrades on the primary tower and its most important support. Spreading upgrades too widely can leave every effect weak and make the physical chain inconsistent.
Q: When should I choose a new tower instead of an upgrade?
Choose a new tower when it completes a working combo, covers a real weakness, or provides a useful fallback. Otherwise, improving an existing reliable interaction is usually safer.
Q: How do I fix a build that keeps leaking enemies?
Watch where control fails, then adjust the weakest link. Reposition the relevant tower, improve grouping, add layered force against heavy targets, or move the final displacement closer to an exposed edge.
The strongest upgrade order is the one that makes your defense repeatable. Build around a clear physical chain, invest in its starting effect, and expand only when the map demands another role.